Thursday, November 20, 2014

We're Just2Gypsies, and "They're All Peanuts!!!"


Even as a small child, Siobhan had her own particular brand of wisdom--and her own quirky way of looking at the world.  Siobhan never had green beans or green peas for dinner; to her, they were "round beans" or "straight beans". ( And they still are.)
 
Straight beans.


Round beans.


When she was 3, I heard Siobhan telling a neighbor's child the Facts of Life..."I know how to tell boys from girls."  I couldn't believe my ears.  And then, nonchalantly she finished  "The girls have long eyelashes".
Boy frog.


On the kindergarten playground, 5-year-old Siobhan's favorite thing was the giant slide.  One day, as she struggled to climb the tall ladder, a little boy waiting below said "I see your underwear."  Without missing a beat, my little daughter said "If you want to see underwear, why don't you just go to Kmart?  They've got stacks of 'em!"


You get the picture...


For some odd reason, Siobhan always had an aversion to peanuts...She hated the taste, and the very texture of a peanut on her tongue would send her spitting and running for the nearest  trash bin. Of course, this peanut phobia spilled over to all the other nuts--Brazil, pecan, walnut, pistachio, nuts of any name.  But no matter what they're called, they're all Peanuts  to Siobhan.  ( Seriously.  You'll never convince her otherwise.)  And according to her, the only good "peanut" is a Circus Peanut.
 
Yum! 


 Recently Siobhan's on-again/off-again boyfriend of seven years brought her a dinky little box of truffles.  Those pitiful truffles were a feeble excuse of an apology--for forgetting her birthday. Again.  My sweet Siobhan graciously thanked him, (which was more than I would have done), and then hesitantly asked  if there were "peanuts" in them.  He assured her there was not.  Wrong, poor fool!

You can just imagine the scene that followed--the spitting and running and gagging. A coughing Siobhan saying "There ARE peanuts in them!!" .  A red faced Michael saying "No no no!  It's not peanuts--it's Pecans!"   And a furious Siobhan shouting "THEY'RE ALL PEANUTS, MICHAEL!!!"  A slamming door.  Exit Siobhan.

Liam and I sat in our porch swing, quietly laughing.  Our lovely daughter is wise and witty, kind and compassionate, and  Full of Fire.   You're no match for her, Michael.  You may as well go home now...

Beware of peanuts.


Friday, October 31, 2014

HALLOWEEN GREETINGS FROM JUST2GYPSIES...


HALLOWEEN GREETINGS FROM JUST2GYPSIES!  And what could be better on Halloween than sharing a couple of  creepy cocktails?

zombie woman : a scary undead zombie girl

Ingredients

  • 1/2 ounce white rum
  • 1 1/2 ounces golden rum
  • 1 ounce dark rum
  • 1/2 ounce 151-proof rum
  • 1 ounce lime juice
  • 1 teaspoon pineapple juice
  • 1 teaspoon papaya juice
  • 1 teaspoon superfine sugar

Instructions

Add the ingredients other than the 151-proof rum to a shaker or a pitcher and stir. Add to a collins glass that is filled 3/4s full with cracked ice.  Enjoy!

post icon


Siobhan's Favorite:

 BLOODY EFFIN' MARY...


Ingredients

3 cups tomato juice
1 cup vodka
1 tablespoon plus 1 teaspoon prepared horseradish
3 ounces fresh lime juice, plus a wedge for rimming glasses
3 ounces Worcestershire sauce
Sriracha sauce
Seafood seasoning, such as Old Bay, for rimming glasses


Directions

Special equipment: 4 Collins glasses

Suggested garnishes: celery sticks, blue cheese stuffed olives, sliced banana peppers. small cooked shrimp, lime and lemon wedges, pickled green beans

In a large pitcher, stir the tomato juice, vodka, horseradish, lime juice, Worcestershire and some Sriracha together until combined. Chill until ready to serve.

To serve, cut a slice in a lime wedge and rub it around half of the rim of 4 Collins glasses. Pour some seafood seasoning on a plate and dip the wet rims into the spice to adhere. Fill the glasses with ice and the chilled Bloody Mary, and garnish as desired.


HAVE A VERY SCARY NIGHT!!


Thursday, October 30, 2014

Note To Siobhan...


Note To Siobhan...

Dearest Daughter,

please PLEASE PLEASE  stop using our best Tupperware bowls for soaking cats' feet--and try not to use their lids as stretchers for injured frogs.  Seriously.  Your heart is in the right place, but it's really kind of gross.  Besides, I need them in the kitchen...Thanks!

Love,
Mum  

Wednesday, October 15, 2014

Building A Gypsy Wagon, Part 11 / Bohemian Bits And Bobs (Tying Loose Ends, Completing Odd Jobs...)

Since my last wagon post, Just3Gypsies Farm has been inundated with emergencies--horse injuries, cat funerals, and dog surgeries.  Such is life on a farm--particularly one that is blessed with a multitude of animals...
 Between emergencies, Siobhan and I have continued to work on our beloved gypsy wagon--building  roof trusses and roof framework while waiting for our tin roofing  to arrive.  When our framing was completed, we concentrated on more pleasurable work-- adding bohemian bits and bobs, tying loose ends, completing odd jobs. All the Fun Stuff.  Some folks say "the devil is in the details".   Other folks say "What the hell does THAT mean?!"  I say  it's the smallest details that give us the greatest pleasure.

Some of the details we added were Necessities...

An antique chest (Cline's antiques, $75.00) with a large drawer for storing table cloths and kitchen linens, and ample cabinet space below for storing canned goods and tableware.  The chest's large flat top accommodates a cutting board and bread basket, and serves as a workspace.
  A fully functioning replica antique icebox (Ebay, $125.00) 
                                           
Gypsies took great pride in their wagons, and kept them scrupulously clean.  Siobhan and I found the perfect cleaning tools to help us uphold the tradition: 

  Ornate vintage clothes brushes (Ebay, $6.00 and $4.00) to hang beneath ledge seats--perfect for keeping cushions clean and bright.

 A beautiful hand painted broom and wooden dust pan, a treasured gift from Siobhan (Victorian Trading Company, $29.95 and $24.95) and a vintage Fuller Brush Company ostrich feather duster (Ebay, $19.99)

DUST PANFAIRY TALE ROSES WOODEN BROOM


Some of the details we added were Luxuries.

 Siobhan remarked that the Horse Chair would be a cozy place to curl up and read or sketch--if it only had a convenient tray to hold a drink or snack .  And so the drop-down shelf tray was built, complete with a wooden rack below it for books or artist supplies. (hinges, Lowes, $; no other expense--made from scrap lumber.)


  True to gypsy tradition, every bed and bench is resplendent with ornate cushions and pillows.

Woven tapestry pillows on Siobhan's Horse Bench (ebay, $18.00 and $33.00).  Arm rests are made from wood scraps and carved wood horse corbels (ebay, $55.00).  * Coordinating small  brush hanging beneath bench seat for cleaning cushions (vintage clothes brush with carved horse head handle, ebay, $14.00).
                                        
Woven tapestry pillows on long bench seat (ebay $33.00 ea.).  Arm rests are built with antique carved wood lion corbels (ebay, $65.00 per pair), and antique brass stair rail brackets (pictured below).  *Vintage carved lint brush with lion handle (ebay, $6.00)  matches carved arm rests.

Spider Web Motif Handrail Bracket In Antique-By-Hand Finish (item #R-010MG-125-ABH)
House of Antique Hardware, $24.95 each.

                                   
Sacred Grove print cushions in lower sleeping quarters (Gael Song, $26.00 ea.)

Various pillows in upper sleeping berth: antique circus print pillows (etsy, $34.00 ea.),  woven tapestry elephant pillow (Amazon, $19.90), embroidered beaded floor cushion (Eyes of India, $31.88).


One of Siobhan's treasured "bits and bobs"--an antique hand carved wood clown, rescued from a now-defunct traveling circus...(private purchase, $110.00)


  Each window in our wagon is adorned with a creamy antique lace panel and an antique embroidered Rabari Banjara valance  (antique lace panels, circa 1920, purchased from Yorke Centre of Antiques, UK, $7.00 - $18.00 ea.) ; antique kutch valances, Maharaiartsus/Ebay, $65.00 - $94.00).


 A custom doggie bench was built beneath Siobhan's back window; the padded upholstered top lifts for easy storage of rawhide bones, dog sweaters, leashes, and treats. No expense--made entirely from lumber scraps and fabric remnants.


Sometimes Siobhan and I will look at something we've built, and say "wouldn't this work better?"  And so we tweak our design a little.

                                                                        
 After several near-slips, we added extra wood handles (Grand River Wood Products, $12.50 ea.) to the sides of Siobhan's ladder as a safety precaution.    


 After Boxing in under the hearth floor extension, we said "Wait a minute!  Why couldn't we add a door to one end and use it for storage?!"  And so we did...
Storage compartment is large enough to accommodate a folding pet gate, a large flashlight, and a small fire extinguisher.


Some of our favorite bits and bobs were added simply for the Pleasure they give us...

Antique carved wood horse corbels, purchased from India through Ebay. ( $55.00 ea ); carved pediment, Cline's Antiques ($16.00).


Antique carved wood king and queen figurines, purchased on Ebay.  ($46.00 pair)


                               Antique horse brasses, purchased through ebay.ie ($16.00 ea).
                               Custom leather martingales, hand made by Master Saddler Robert
                               Steinke, Ireland ($44.00 ea.)


And now, FINALLY, our tin roofing panels have arrived!  So it's Back To Work--until next post...

"Baxt hai sastimos tiri patragi."
"good luck and health"


Thursday, August 7, 2014

Building A Gypsy Wagon -- Part 10 /Icing Cakes And Tiling Walls... (Learning To Build A Tiled Heat Shield Surround)


Siobhan and I are still working companionably on our gypsy wagon...As usual, some days are more productive than others...

 Our proudest project of late is building a three-wall ceramic tile surround.  This will serve as a wall protector/heat shield for our wagon's wood stove.  Naturally, neither one of us has ever tried to lay tile--but why should that stop us?!  After reading several how-to articles, it suddenly occurs to me--if we can ice a cake, we can tile a wall...

Eager to begin, we measured our areas to be tiled (a 24" x 42" panel directly behind our wood stove, with an 18" x 42" panel on each side).  I gathered all the necessary items already on hand, while Siobhan compiled a list of the remaining materials and tools  needed.  With confidence and a credit card, we headed for Lowe's...

                                                                                   
                        Our Materials List is as follows:
                                                                                   
 *(1) 2" x 2" pine board  (to add to existing framing on left wall of surround)
* 40 russet red  majolica tiles, 6" x 6" (decorative, Lowe's, $16.50 per box of 10)
*14  russet red antique majolica tiles, 6" x 6" (decorative, Ebay, var. prices)
* 12 amber antique majolica tiles, 6" x 6" (decorative, Ebay, var. prices)
*90  antique majolica tiles, 1 1/2" x 3 (field)
*10  antique majolica tiles, 1" x 6" (field)

* Imperial Stove Board Wall Spacing Kits (10 screws & spacers per kit)

*(1) 50 lb bag thin-set mortar mix
*(1) pail of ready-mixed grout
*(2) 3' x 5' sheets of  Hardi-backer cement backer board


Our Tools List includes :

* inexpensive paint tray with several disposable liners--for mixing mortar (already had on hand)
*tiler's trowel with serrated edge (Kobalt 11-inch v-notch ceramic floor trowel, Lowe's , $9.95)
*clean pint jar and quart jar (for measuring mortar mix and water)
*wooden paint stirring sticks (for mixing mortar)
*grout float(Tile Solutions, Lowe's $9.98)
*(2)large sponges
*utilty pail (for water)
*Nattco 14" tile cutter (Amazon, $24.67)
*4' metal box level  or straight edge  (already had on hand) 
*scoring knife (Blue Hawk, Lowes, $8.98)
*tile spacers, 1/4" (Tavy, Lowe's, $5.18)
*tile spacers, 1/8" (Tavy, Lowe's, $5.18)
 

Siobhan and I returned home from our shopping trip, and set to work on the back panel...First, we measured and marked the Hardi-Backer board, using the convenient factory-marked grid work.  We lay our 48" level along the line to be cut, then ran the scoring tool along the level's edge 5 or 6 times.  We slid the board forward until the scored line was on the table's edge, pressed down on the excess board---and NOTHING.  It didn't "snap". Or "bend".  Or even "give a little".  Guess we didn't put enough pressure on the ol' scoring knife.  So we try again, scoring the same line  about 20 times, and voila!  It breaks, leaving a nice clean edge.  (Eventually we got the hang of it, and could break one after 4 scores.)  We marked and drilled holes where the screws would anchor our tiled panel to the wall.  We drilled the holes the same diameter as the screws we'd be using, but  then with a larger bit, drilled a recess to allow for the rounded screw heads.


 http://www.hammerzone.com/archives/flooring/tile/02/backer_board/fltbhb46a_Hardibacker_install.jpg


Before going any further, Siobhan and I laid out our tiles on a 2nd sheet of backer board, placing them as we intended them to go on our wall, removing the tiles that would cover the drilled holes.  (We even used the plastic tile separators so our measurements would be exact.)


Tile Spacers


Once we were satisfied with the spacing, we proceeded to mix our thin-set mortar.  Using the same ratio of powder to water, we scaled back the mfg's directions to a more moderate amount (!), and got to work...

Spreading tile adhesive
Tiler's trowel with notched edge.


Using the tiler's trowel, we applied a thin coat of mortar to a section of backer board.  Beginning at the lower left corner, we transferred our first row of tiles, keeping the edges even with the backer board's edge and using tile spacers between.  After placing each tile, we gently rocked them from side to side, as directed. (Hard to believe, but this really does grab hold of the tile instantly, like some kind of weird suction cup.)  We continued transferring tiles, row after row, until our entire board was covered (except for the four tiles that would cover the screw holes).

We allowed the tiles to sit overnight to ensure drying.  The following day, Siobhan and I opened our pail of ready-mixed grout and began again. We removed all the tile separators, saving them for later use.  Using the grout float, we pressed grout between a row of tiles, then wiped over it with the float's edge.  Next, we wiped the row with a dampened sponge, smoothing the grout line and cleaning the tile's surface at the same time.  We rinsed the sponge immediately in a pail of water, and then applied grout to the 2nd row.  (We found that by doing one row at a time, the grout drips and smears didn't have time to dry on the tile before being wiped clean.)


grouting.jpg - © Home-Cost.com 2014
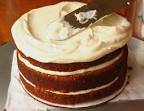
(This is NOT a photo of our tile--just an illustration of HOW we grouted our wall!)
 
We continued in this manner until  all crevices between tiles and rows were neatly grouted.  We allowed the panel to dry overnight.  The next day, we carefully placed the panel against the wagon wall, with a 2 x 4 scrap beneath it to raise it 1 1/2"  from the bench seat's wooden surface.  (There is a 1" minimum distance required with a standard heat shield.)  We aligned the panel's pre-drilled holes with the corresponding holes in our wagon's wall and framing.  I secured the top of the panel first, working alone in close quarters out of necessity; with a screw and drill in my left hand ( in front of the tiled panel )--and a metal spacer held between thumb and index finger of my right hand (over the top and behind the tile panel, between it and the existing wall), I managed to fasten it securely, leaving the required 1" of space between panel and wall.  I secured the remaining two holes in the same way, working from the bottom of the panel.  When all 4 screws were secured, I applied a small amount of freshly mixed mortar to the backs of our 4 remaining tiles, and adhered them in place over the recessed screws.  We allowed these tiles to dry overnight, and grouted them the next morning.  Now the first--and largest--panel in our heat shield is complete...On to the next one!


Left and back panels.

Back and right panels.
Tiled floor.

We measured and cut our backer boards for the two  side panels, tiling  and securing them in the same manner as the first.  The end result is pleasing to the eye, as well as safety-compliant.  Siobhan and I then used some of our leftover antique tiles and backer board scraps to build a matching tiled surround, incorporating into its design several pieces of our most treasured wood--salvaged panels and corbels from Bunratty Castle in Ireland.  (These are authenticated and approximately 600 years old).  This variation of a fireplace surround is to be used as a front for our 3-paneled enclosure, framing our small wood stove and tiled heat shield. The area directly above the tiled surround is enclosed with wooden siding, painted with Tavern Green Milk Paint, and matching the wagon's interior walls. ( This wooden enclosure safely hides our stovepipe from view, while still allowing access if needed. )  A small sturdy mantel built from weathered barn wood ties together the wooden and tiled portions.  The mantel is functional as well as aesthetic--its scaled brass railing keeps our antique clock and candlesticks from sliding off when the wagon is in motion.    As a final touch, we hung a framed watercolor of Bunratty Castle in a place of honor over the mantel.      

  .
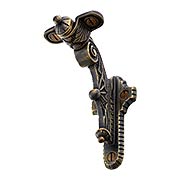
600-yr-old hand carved wood corbel.

Antique ceramic tiles framing salvaged carved wood panel from Bunratty Castle, Ireland. (The hand carved oak leaves and acorns are recent additions...)

Completed tile heat shield and wood stove surround.


Framed watercolor of Bunratty Castle, Ireland; antique brass peacock candlesticks.


Wednesday, July 2, 2014

Burning Steak With Grainne And Siobhan.../ or--How NOT to cook!


Give us an outdoor fire and a couple of cast iron kettles, and Siobhan and I become the Julia Child And Martha Stewart Of The Woods.  Hand us a chunk of meat and point us toward the kitchen, and chaos and mayhem too often follow...

Take yesterday.  Totally burnt out on healthy eating, Siobhan and I voted to fix steak for dinner.  (This was a bold act of rebellion--normally we eat red meat only on Christmas Day.)   Liam practically shouted "Thank the good Lord--meat at last!"

While the steaks were marinating,  dark clouds were rolling in.  Soon the window panes rattled with the ominous rumble of thunder, and angry bolts of lightning flashed all around us.  What choice did we have but to cook the steaks inside?

Siobhan and I are devoted disciples of fire pits and grills; the idea of cooking meat on a stove was more than a little daunting. How were we going to do this?  Should we try broiling them on a rack, or baking them in a roasting pan?  With husbandly patience and understanding, Liam loudly sighed and rolled his eyes to heaven.  After rattling and clanging around in the cupboard, he emerged with three brand-new Lodge oval cast iron skillets, complete with cute handle potholders and wood boards to sit them on.  (Oh yeah--  I  remember now--I bought them at a yard sale last year...So THAT'S where they went!)

 Fajita Set


Siobhan recognized them at once, as her boyfriend is avid meat eater--"That's how they cook steaks at the steakhouse!"  She jumped online and found a recipe for Easy Fail-Proof Pan Seared Best Steak You Ever Ate.  It sounded simple enough...

So with a glass of wine and a cheerful attitude, we followed the instructions to a tee:

1. Place clean dry cast iron skillet on stove burner--NO oil, butter, or grease--and turn burner on high.

2.  Heat skillet to Smoking Hot--when drop of water will hop around in pan before evaporating.

3.  Place steak in middle of skillet; cook for 2 minutes.

**  IT IS NORMAL FOR PAN TO SMOKE, CRACKLE, AND SIZZLE.  DO NOT PANIC.  IGNORE SMOKE-- DO NOT MOVE STEAK FROM BURNER OR REDUCE HEAT. **

4.  When 2 minutes are up, turn steak over, taking care to place it exactly where first side lay.  Cook this side on high heat for 2 minutes. (Again, see warning above.)

5. Remove skillet from burner and place in a pre-heated oven.  Cook at 325 deg. until meat thermometer reaches desired temperature for rare/medium/well done. 

Piece of cake.  Or at least, it should've been. ( Maybe it would have been, if we hadn't been cooking 3 at a time.)

The first 2 minutes were uneventful; the pan-side of all three browned beautifully.  I suppose Siobhan and I were too focused on timing each pan  to even notice the smoke.  But then we turned all the steaks...


       Thirty seconds later, the first smoke alarm went off:   beep... BEEP... BEEP... BEEP...Our 3-legged dog hid under the desk. Liam remained in the study.

Coughing, Siobhan looked over her shoulder and said "Christ on a cracker!  Look at all the smoke!" From the kitchen ceiling all the way down to our knees was filled with meat-scented smoke.  And we still had a whole minute to go.  We resisted the urge to crawl on our bellies to safety; instead, Siobhan ran around opening windows while I guarded the pans and the clock.  On went the coughing and beeping...


Twenty seconds to go, and the 2nd smoke alarm went off:    fire!   FIRE!  FIRE!  FIRE! .....Siobhan and I laughed heartily; we had no idea our smoke alarm could talk.  Meanwhile, our 3-legged dog flung herself through the pet door and hid in the garden.  Liam still remained in the study.

Finally our 2nd two minutes were up, and we shoved all three skillets in the oven.  By now, our other two dogs were barking, adding to the coughing/beeping/laughing/fire-yelling cacophony.  Still no Liam.  With thoughts of smoke inhalation looming in our heads, we burst into his study...Calmly he sat in front of his computer screen, telephone in hand.  Siobhan exclaimed "Thank goodness you're okay!  We thought you'd died in the fire!" Without even blinking,  Liam replied "What fire?!"  And so we try to explain...and explain...and explain...Then--

Oh dear.  We forgot the steaks.  In dread, we ran back to the kitchen, yanked open the oven door, and ... damnation!  Three new skillets, all filled with crispy black leathery unidentifiable remnants of meat.  Bummer.( I would love to get my hands on the lunatic that wrote that fail-proof crap.)   Sighing, we throw the smoldering remains in the trash bin, retrieve our traumatized dog from under the patio chair, and sent Liam out for burgers. We've decided that steak is over-rated anyway.  But the next time we have a fire, I intend to slap Liam silly before I run outside.  Just to save his life.  (Hopefully he'll follow.)


Until next time--

Grainne      


.