Tuesday, February 16, 2016

A Gypsy's Advice: " So--You'e Ready To Build Your Own Gypsy Wagon..."


So--you're ready to build your own gypsy wagon...Before you begin, maybe you would like a few helpful hints from someone who has Been There...


1.  NEVER EVER  put all your weight on a hammer handle to remove a bent nail if you're standing atop a ladder. (You will find yourself flying through the air until the ground rises up to meet you.)

2.  The ground gets harder as we get older.

3.  NEVER step out the wagon door onto a step stool (or upside-down milk crate) in the rain.

4.  SEE #2.

5.  Contrary to popular belief,  milk paint WILL keep for several days-- especially if stored in a recycled margarine tub.  (I use I CAN'T BELIEVE IT'S NOT BUTTER).

6.  If you are attempting to fasten one board on top of another with a screw gun or impact drill, always put the center screw in first.  NEVER put the screw in either side first.  (The direction the drill is turning will swing the board around like a helicopter propeller and clock you in the head.  Or knee.  Or stomach.)  You get the picture.

7.  **Please note: Traditional gypsy ledge wagons are 4" wider at the top than at the bottom, which gives them a lovely--and easily recognizable--shape.  That being said...If you build your wagon walls in sections like Siobhan and I did, be sure to use temporary rafters for bracing the side walls together until your bowed rafters (or clerestory roof) are in place.  Otherwise, weight and gravity will cause the walls to lean out considerably more than 4".  Like most things, this is easier to fix beforehand than after-the-fact!  

 8.  If you  choose to build a clerestory roof, (as we did originally!), BE SURE to consider the combined weight of ALL the building materials before you begin.  Not just the wood framework and roofing--EVERYTHING.  All transom windows, brass awning hinges, brass handles and latches, wood framework, wood siding panels, plywood underlayment, tar paper, metal roofing, roofing screws.  Everything.  Blindly guess at an estimate, and you may end up like we did--with a perfectly lovely clerestory roof that is too heavy for your walls to hold up.  When you get through throwing tools and cursing, you will first need to re-design, tear apart and salvage what you can--and then you can re-build.  THAT'S WHEN THE FUN REALLY BEGINS...

9.  Take your time.   Work on your wagon only when you WANT to--never feel like you HAVE to. Resist the urge--Don't set a deadline...Unforeseen circumstances will inevitably pop up and delay construction.  Don't stress over it.  Above all, take pleasure in your work.  Enjoy the weight of a well-worn hammer in your hand; find joy in the smell of fresh sawn wood...

10. kushti bak! (Good Luck!)


Friday, January 22, 2016

WELCOME TO OUR VARDO!!!


                                                      WELCOME TO OUR VARDO!!!


 Siobhan and I are finally "all moved in"; we spend quite a bit of our free time in the caravan.  Liam usually remains in the house, cheerfully waving from a window now and then...
 
 
  We have not built the steps yet--the weather has been much too cold!


But our welcome sign is out...


Our caravan rules are posted by the door...
 
"Watch the sunrise, Listen to birds, Feel the breeze, Relax, Take a nap, Drink Iced tea"
 
 
We filled our wagon with antiques and curiosities, and all the necessities to make a vardo a home...
 
A lovely little woodstove for burning Irish peat, and a little  iron kettle for heating water...


An Indian spice box for tea bags, and a English tin for sugar...
                                                                             
                                                                                
A refrigerator for cream...


Comfy cushioned seats for sitting...


Favorite antique dishes for dining...


A sweet antique tea towel for drying...


A lovely antique oil lamp for lighting...
 
Soft mattresses for sleeping,  pin-tucked rosette comforters for warmth, and hand-made pillows for charm...


Books for reading, music for listening, art for contemplating...


Treasures to cherish...


Stories to tell...


Memories to share...


Friends are welcome here--Come and sit by our fire...


Thursday, December 24, 2015

Building A Gypsy Wagon, Part 14: FINALLY Our Wagon Is Finished!


FINALLY--AT LAST!!!  Three years and a whole lot of lumber and screws later, our gypsy wagon is finally finished...Special thanks to my talented daughter, Siobhan, for helping me tremendously with the painting, carving, and decorating. 


Many thanks to my husband, Liam, for ripping the 14' two-by-fours for me, and for moving our wagon uphill without too much damage (ha! ha!) to our Travellers' Rest camp site.  (Seriously, don't try to use a tow dolly in order to make a sharper turn with a ledge  wagon.  It raises the front of the wagon so much that the back end tends to drag over high spots--ripping off your toolbox and storage compartments...Sigh. )

 
 Oh well.  I can always rebuild the storage boxes after the holidays are over...


BEST WISHES FOR A MERRY CHRISTMAS!

Just 2 Gypsies,
Grainne and Siobhan


Monday, November 2, 2015

Building A Gypsy Wagon, Part 13: A ROOF AT LAST!!!


da da da DA! da da da DA da DAAA!  Trumpet fanfare and flourishes...

A ROOF AT LAST!!!

OUR GYPSY WAGON IS ALMOST FINISHED!!!

After a major setback (oops--are our faces red!) due to the unforeseen weight of our clerestory roof, we modified our original plans and went with a bowed roof instead. We dismantled our lovely clerestory roof and re-used most of the salvaged building materials.


 Thankfully we were able to incorporate the stained glass transom windows into our new design, which will let in more sunlight, as well as help with cooling the wagon in summer...

Our new bowed roof was constructed as follows: 

Using roughed-out oak rocker runners (purchased from an out-of-business chair maker) and pine 2" x 3" studs, I built 12 arched trusses, allowing for an 8" overhang on each side.  Using roughed out oak chair back rails and various carved wood corbels, Siobhan built flying buttresses to add support to the arches.


I stained and gold-stenciled five 4' x 8' thin plywood panels and secured them face-down to the trusses,  using the stained undersides as the wagon's ceiling and the unfinished topside as roof underlayment.


 We primed and painted 2' x 4' pressed tin panels for the roofing, using a layer of tar paper between the tin and the plywood underlayment.  Hex head sheet metal screws with rubber backed washers were used for securing the panels to the underlayment.  After adding painted wood trim along the roofline of the wagon's front and back, our roof was finally completed.  All that remains to do is paint and hang the matching tin gutters on the sides, and install the solar power system...


As soon as the ground dries from last week's rain, our wagon will be moving to its place of honor--nestled among the moss-draped oaks of Travellers' Rest, here on Just 2 Gypsies Farm. 

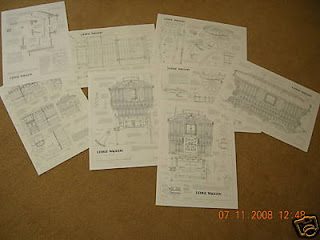
What a lovely ending to a story that began with a handful of papers and a rock...


---------------------------------------------------------------------
 
**More photos to come in the next two weeks...